How to install the Xiaomi Outdoor Camera BW500 and its solar panels?
To install the device, please refer to the following steps:
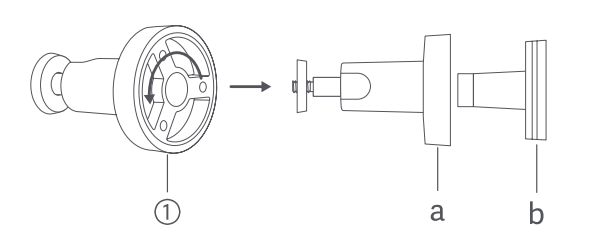
1. Rotate the camera mount counterclockwise to remove the base;
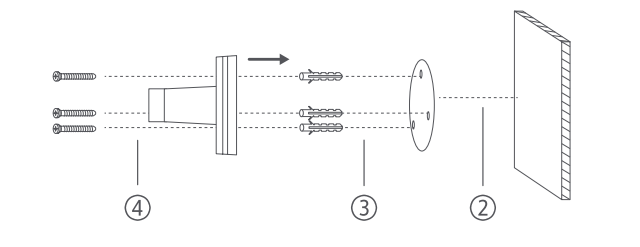
2. Select a suitable mounting position. It is recommended to be 7-10 feet (2-3 meters) above the ground, without buildings or trees blocking the mounting wall. And then place the mounting template sticker on a flat wall surface;
3. Drill holes (each hole has a diameter of 6mm and a depth of 30mm) and install wall plugs;
4. Use screws to fix the base to the wall;
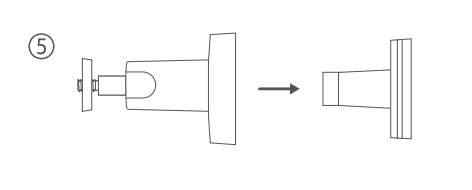
5. Fix the locking cap onto the base;
6. Hold the camera by hands and fix it on the mount;
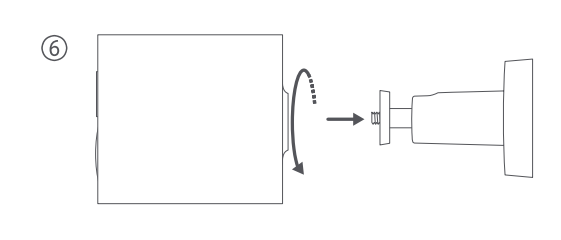
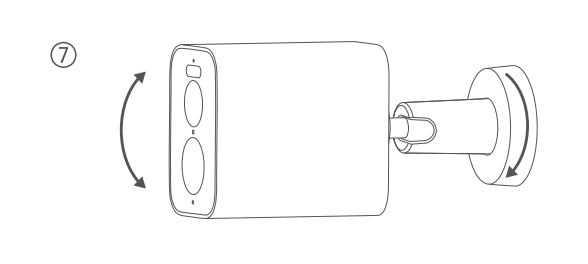
7. Adjust the angle of the camera and tighten the locking cap;
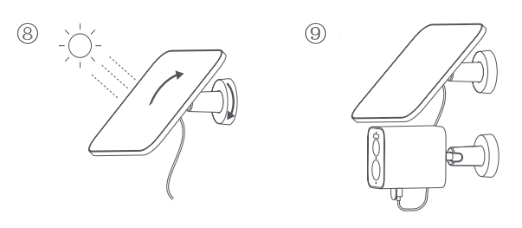
8. Fix the solar panel on the mount and adjust the angle to maximize direct sunlight. Then tighten the locking cap;
9. Fully insert the charging connector and waterproof gasket into the Type-C power port of the camera.
Note:
1. When installing the camera, please place it and its power port facing downwards. To prevent water ingress, cover the power supply with a protective cover when not in use;
2. To avoid damage caused by the outdoor camera falling, it is not recommended to use double-sided tape to fix it;
3. This solar panel is compatible with some models of the Xiaomi BW series outdoor cameras.
1. Rotate the camera mount counterclockwise to remove the base;
2. Select a suitable mounting position. It is recommended to be 7-10 feet (2-3 meters) above the ground, without buildings or trees blocking the mounting wall. And then place the mounting template sticker on a flat wall surface;
3. Drill holes (each hole has a diameter of 6mm and a depth of 30mm) and install wall plugs;
4. Use screws to fix the base to the wall;
5. Fix the locking cap onto the base;
6. Hold the camera by hands and fix it on the mount;
7. Adjust the angle of the camera and tighten the locking cap;
8. Fix the solar panel on the mount and adjust the angle to maximize direct sunlight. Then tighten the locking cap;
9. Fully insert the charging connector and waterproof gasket into the Type-C power port of the camera.
Note:
1. When installing the camera, please place it and its power port facing downwards. To prevent water ingress, cover the power supply with a protective cover when not in use;
2. To avoid damage caused by the outdoor camera falling, it is not recommended to use double-sided tape to fix it;
3. This solar panel is compatible with some models of the Xiaomi BW series outdoor cameras.
Does it help?
Yes
No